Crochet Daisy Flower Granny Square
.jpeg)
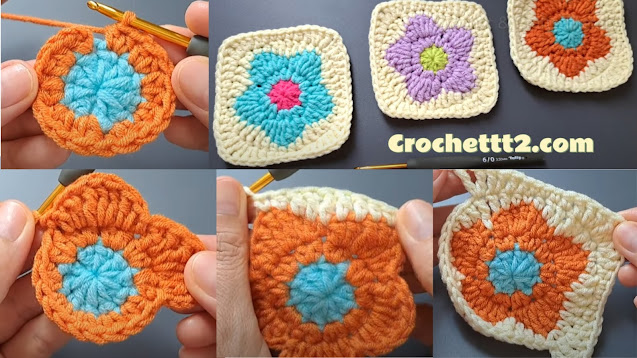
🧶 Materials & Setup Yarn : Worsted weight (e.g., cotton or acrylic), 3 colors: Color A for the daisy center Color B for daisy petals Color C for the outer granny square rounds Hook : 4 mm (G) Others : Scissors, yarn needle 🌸 Round 1 – Daisy Center (Color A) 1. Magic ring : Create and hold loose. 2. Chain 3 (counts as 1 dc). 3. Work 11 double crochet into the ring (total 12 dc stitches). 4. Join with a slip stitch to the top of starting chain‑3. 5. Pull the ring tight to close the center. 🥀 Round 2 – Petals (Color B) 1. Join Color B in any stitch. 2. (Chain 3, dc in same stitch), chain 1 — this forms a small petal base. 3. Skip 1 stitch, then slip stitch into the next stitch to secure. 4. Repeat steps until you have 12 petals evenly around. 5. Slip‑stitch to t...
.jpeg)
.jpeg)


.jpeg)
.jpeg)
.jpeg)